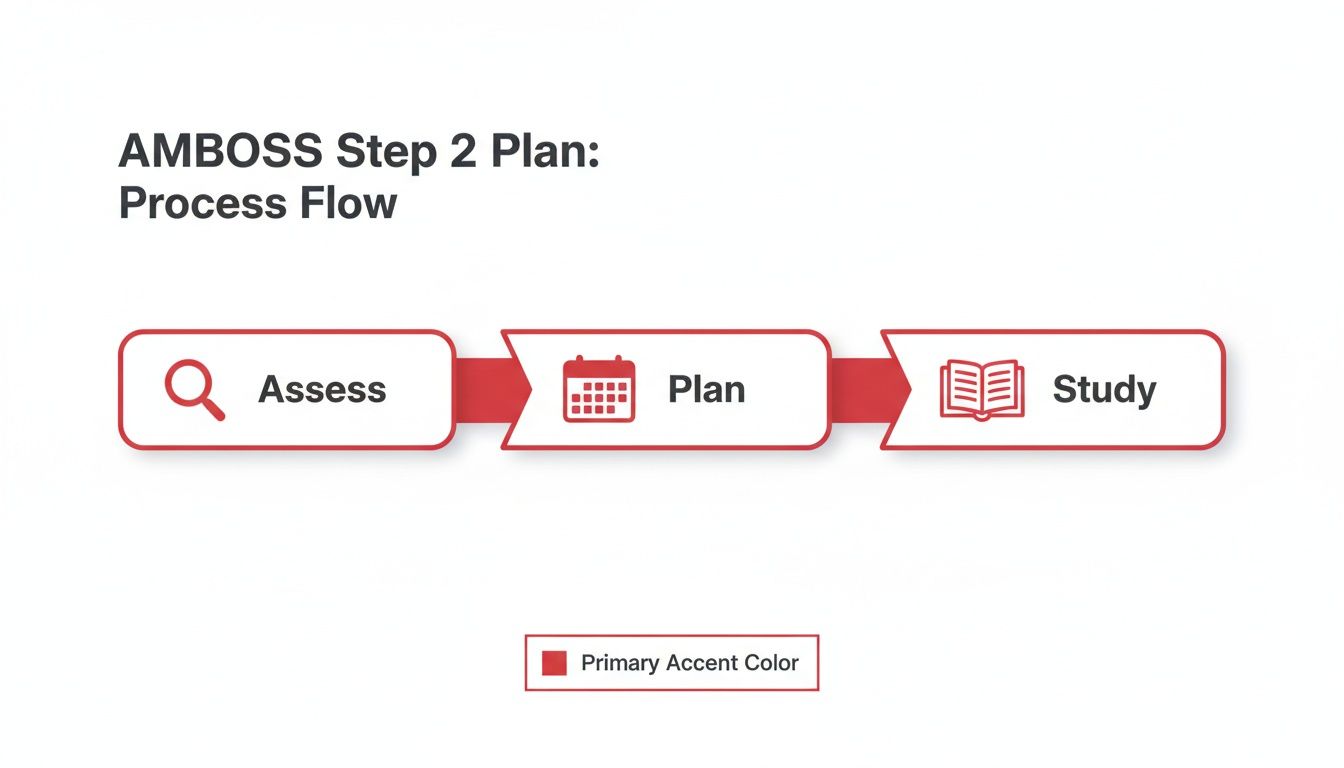
Starting your AMBOSS Step 2 prep isn't just about cramming facts; it's about building a smart, actionable framework from day one. A solid plan always starts with an honest look at where you stand. A diagnostic self-assessment helps you pinpoint your strengths and weaknesses, making sure you spend your precious study time where it'll actually make a difference.
Your High-Yield AMBOSS Step 2 Game Plan
Kicking off your dedicated study period for Step 2 can feel overwhelming, like staring up at a mountain. You know where you need to go, but the path forward seems murky. The trick is to break it down into a structured, phased approach that keeps you from burning out while maximizing your score.
Forget just plowing through random questions. Your strategy needs to be intentional.
This all starts with a baseline assessment. Before you even think about tackling thousands of questions, take the AMBOSS Self-Assessment or do a full block of 40 random, timed questions. This initial data is your personal roadmap. It’ll show you exactly which systems are your strong suits and which ones are crying out for help. Don't sweat a low score at this stage—its only job is to diagnose, not define your potential.
Creating Your Personalized Roadmap
Once you've got your baseline, it's time to dig into the results right there in the AMBOSS platform. Look past the overall percentage; the real gold is in the details.
- System-Specific Performance: Are you crushing GI but getting crushed by Cardiology? The analytics will spell it out, telling you exactly where to focus your content review first.
- Question Difficulty: Pay close attention to how you do on the 4 and 5-hammer questions. These are the complex, multi-step reasoning problems that separate a good score from a great one.
- Article Cross-Referencing: For every single question you get wrong, click into the linked AMBOSS Library article. Don't just read the explanation for that one topic; explore the related concepts to build a much stronger, more connected knowledge base.
This process turns raw data into a truly personalized study plan. Instead of following a generic schedule you found online, you can dedicate more time to your weak areas and methodically turn them into strengths.
Sample 6-Week AMBOSS Step 2 Dedicated Study Schedule
So, what does this look like in practice? Here’s a tangible framework for a 6-week dedicated study period. Think of this as a template, not a strict set of rules. You'll want to adjust it based on what your diagnostic assessment tells you. For a deeper dive into different timelines and scheduling strategies, check out this comprehensive USMLE Step 2 CK study plan.
This table provides a high-level overview of how you might structure your weeks using AMBOSS as the cornerstone of your prep.
| Study Week | Daily Qbank Goal (AMBOSS) | Key Focus Areas (AMBOSS Library) | Weekly Milestone |
|---|---|---|---|
| Week 1 | 40 questions (1 block) | Major systems (Cardio, Pulm, GI) based on diagnostic | Complete baseline assessment, solidify weak areas. |
| Week 2 | 40 questions (1 block) | Secondary systems (Renal, Endo, Heme/Onc) | Review all incorrects from Week 1, see improvement. |
| Week 3 | 80 questions (2 blocks) | High-yield subjects (Biostats, Ethics, Patient Safety) | Take NBME practice exam. Build stamina. |
| Week 4 | 80 questions (2 blocks) | Targeted review of NBME weak points | Integrate Anki for weak concepts. Master timing. |
| Week 5 | 120 questions (3 blocks) | Review highest-yield articles, focus on 5-hammer Qs | Take UWSA 1 or 2. Simulate test day conditions. |
| Week 6 | 80-120 questions (2-3 blocks) | Final review of key charts, algorithms, and notes | Complete Free 120. Taper studying 1-2 days before exam. |
Notice how the plan shifts gears—it moves from building your foundation to targeted practice and, finally, to building the stamina you'll need on test day. This strategic progression is absolutely critical for hitting your peak performance when it counts.
A great study plan is a living document. Be ready to pivot your weekly focus based on your Qbank performance and how you're feeling about different subjects. Flexibility is key.
Mastering the AMBOSS Qbank for Step 2
Think of the AMBOSS Qbank as the engine of your Step 2 prep. Just doing questions, though, is a recipe for hitting a plateau. Real progress comes when you treat every question block as a serious learning opportunity, not just a way to see what percentage you got right. It's all about digging into the strategy behind each question and every single answer choice.
A solid, personalized plan starts with how you build your sessions. Don't just jump into random blocks. Early on, stick to system-specific, untimed blocks in Study Mode. This lets you see the explanations immediately and use the linked Library articles to fix knowledge gaps on the fly. As you get closer to your test date, you’ll want to shift to mixed, timed blocks in Exam Mode to build up your stamina and get used to the clock ticking down.

Strategically Customizing Question Blocks
The settings inside the AMBOSS Qbank are your control panel—don't ignore them. By tweaking the difficulty and topics, you can design sessions that are perfectly matched to what you need to work on that day.
- Difficulty (1-5 Hammers): Start with a mix of 1-3 hammer questions to build a solid foundation. Once you're feeling more confident, intentionally create blocks of 4-5 hammer questions. These are the tough, multi-step vignettes that often separate a good score from a great score in the 250+ range.
- Systems and Subjects: Let your performance data be your guide. If you're getting crushed by nephrology, spend a couple of days hitting focused blocks on that system. Make sure you're consistently mixing in high-yield subjects like ethics and biostatistics, even if you think you have them down.
- Exam Mode vs. Study Mode: These two modes are for completely different things. Use Study Mode when you're learning new material and want to do a deep dive. Switch to Exam Mode to test your recall and timing under pressure. A good study plan will have a healthy balance of both.
AMBOSS Qbank Mode Comparison
Knowing when to use Study Mode versus Exam Mode is key to studying efficiently. One is for learning, the other for performing. Here's a quick breakdown to help you decide which mode fits your goals for a given study session.
| Feature | Study Mode | Exam Mode |
|---|---|---|
| Primary Goal | Deep learning & content review | Test simulation & performance assessment |
| Answer Feedback | Immediate, after each question | Delayed, after completing the block |
| Timing | Untimed (or self-paced) | Timed, to mimic real exam conditions |
| Library Access | Easy access via pop-ups (Attending Tip) | Disabled during the block to prevent aid |
| Best For | Building foundational knowledge | Assessing speed, stamina, and recall |
| When to Use | Early prep, weak areas, new topics | Mid-to-late prep, NBME simulation days |
Ultimately, you'll start heavily in Study Mode to build your knowledge base and gradually shift almost entirely to Exam Mode in the final weeks to sharpen your test-taking skills.
The Art of Reviewing Every Single Question
Here's a hard truth: how you review your blocks is more important than how many questions you do. The students who crush this exam are meticulous about their review process. They often spend just as much time—if not more—analyzing the explanations as they did answering the questions. This is where the real learning kicks in.
Your goal is to understand the "why" behind every answer, correct or not. As you review, ask yourself these three questions:
- Why did I get this wrong? Was it a true knowledge gap? Did I misread the vignette? Or did I fall for a classic distractor?
- Why was the right answer correct? Force yourself to explain the reasoning from start to finish in your own words. Don't just glance at the explanation and move on.
- Why were the other options incorrect? This is a game-changer. For every distractor, explain exactly why it's the wrong choice. This solidifies your understanding of similar-sounding diseases and presentations.
Don't just read the main explanation. Always read the "Attending Tip." It often contains a clinical pearl or a high-yield tidbit that makes a complicated topic click and actually stick in your memory.
This systematic review turns a passive task into an active one. For instance, say you miss a tough cardiology question. Instead of just reading the explanation on hypertrophic cardiomyopathy, click the linked Library article. Skim the pathophysiology, see how it differs from other cardiomyopathies, and then immediately do five more questions on that specific topic. That’s how you turn one mistake into true mastery. To put your new knowledge to the test, you can find plenty of Step 2 CK practice questions to see if the concepts have stuck.
Leveraging the AMBOSS Library Like an Expert
So many medical students fall into the same trap: they treat the AMBOSS Library like a digital textbook, something to crack open only after getting a question wrong. If you want to really get the most out of your AMBOSS Step 2 prep, you need to flip that script entirely.
Think of the Library less as a passive reference and more as an active, interconnected web of knowledge. It should be the foundation you build before you start testing yourself, not just the safety net that catches you when you fall.
For instance, if you know Cardiology is a weak spot, don't just wait for the Qbank to remind you of that painful fact. Be proactive. Start your study day by spending 30 minutes in the Library digging into the main article on "Acute Coronary Syndrome." This builds a solid mental framework before you even see a single vignette, which makes a world of difference.

Activating High-Yield Mode for Focused Review
One of the most powerful, and often overlooked, tools in the Library is the "High-Yield" toggle. Let's be real—when you're deep in your dedicated study period, you don't have time to re-read every last detail about a condition. This is where that little toggle becomes your best friend.
Flipping it on instantly strips an article down to the most essential, board-relevant information. It's perfect for a quick, targeted review. Say you're about to tackle a block of endocrinology questions. You could spend just 15-20 minutes zipping through the high-yield sections for Cushing syndrome, Addison disease, and thyroid storm. This simple warm-up primes your brain with the key diagnostic criteria, the "next best step" in management, and classic buzzwords, making you noticeably faster and more accurate in the Qbank.
Think of High-Yield mode as your personal attending physician pointing out exactly what you need to know for rounds. It cuts through the noise and focuses your attention on what truly matters for your exam.
A Practical Walkthrough of Integrated Learning
Let's see how this works in practice. Imagine you’re trying to solidify your understanding of inflammatory bowel disease. Here’s how an expert would use the Library:
- Start Broad: First, open the main Library article for "Inflammatory Bowel Disease." Scan the high-yield overview to cement the core differences between Crohn's disease and ulcerative colitis.
- Go Deeper: You'll notice hyperlinks woven right into the text. When you see "extraintestinal manifestations" or "toxic megacolon," give them a click. This lets you dive into related concepts without ever leaving the ecosystem, reinforcing how these clinical ideas connect.
- Bridge to Questions: Now for the game-changer. Look at the sidebar of the article. You'll see an option to launch a Qbank session based specifically on that topic. After reviewing the content, you can immediately test what you just learned with perfectly matched questions. This is how you close the loop between learning and application.
This method transforms passive reading into an active, integrated study session. You're not just memorizing isolated facts; you're building a connected understanding of disease processes, which is exactly what Step 2 is designed to test.
Smart Integrations for Maximum Retention
The Library's true strength is how it connects with other tools, and the official AMBOSS Anki Add-on is a must-have. It turns your content review into knowledge that actually sticks.
As you read an article, you can highlight any snippet of text—a drug side effect, a diagnostic criterion, a key statistic—and instantly create a flashcard. But the real magic happens later. When you're reviewing your Anki deck and hover over that concept, a pop-up from the original Library article appears, giving you full context without ever switching apps.
Imagine you've made a card for the Reynold's pentad. Weeks later, you can review the entire "Acute Cholangitis" article section with a single mouse hover. This seamless integration makes your spaced repetition exponentially more effective and helps solidify your grasp of USMLE Step 2 CK high-yield topics for the long haul. Every minute in the Library becomes a productive step toward your goal score.
Using Analytics to Guide Your Study Strategy
Let's be honest: the fastest way to turn an average Step 2 score into a great one is by being smart about where you spend your time. Flying blind through question blocks without really looking at your performance is like trying to navigate a new city without a map. You might get there eventually, but you’ll waste a ton of time and energy. Think of the AMBOSS analytics dashboard as your personal GPS, showing you exactly where you are and the most direct route to your goal score.
Glancing at your overall percentage correct is just scratching the surface. The real gold is in digging deeper to figure out the patterns behind your mistakes. Don't just see a 65% on a block and move on. Ask yourself why it was a 65%. Was it a specific system, like endocrinology, that dragged you down? Or maybe you're consistently fumbling questions that require multi-step management.
The analytics dashboard breaks all of this down for you, visualizing how you're doing across different disciplines, organ systems, and even article types. This is how you stop guessing and start making truly informed decisions about your study plan.
Interpreting Your Performance Graphs for Actionable Insights
Those graphs in AMBOSS aren't just pretty charts; they are powerful diagnostic tools. You need to look for trends. Are your scores in cardiology steadily climbing while your neurology scores have totally flatlined? That’s a crystal-clear signal to shift your focus for the next few days.
Here’s how you can turn that data into a concrete plan:
- Hunt Down Your Weaknesses: Pinpoint your 3-5 worst-performing systems or subjects. Right then and there, schedule specific study blocks just for those areas in the upcoming week.
- Analyze by Question Type: Are you struggling with "next best step in management" questions but crushing the diagnostic ones? That tells you something important. It means you need to spend more time with the treatment algorithms in the AMBOSS Library, not just re-reading pathophysiology.
- Keep an Eye on the Peer Comparison: The feature showing how you stack up against your peers is a fantastic motivator and a necessary reality check. If you’re consistently below average on a topic, that’s a high-yield area to shore up.
Your analytics tell a story about your thought process. A low score in surgery might not mean you don't know the material, but that you struggle with the fast-paced, decision-making style of surgical vignettes.
This kind of detailed analysis helps you fix the root cause of your errors, not just the symptoms. It’s the difference between memorizing a fact for a single question and truly understanding a concept that will help you on dozens of future questions.
Simulating Exam Day with AMBOSS Self-Assessments
Once you’ve put in the work shoring up your weak spots, it's time to test your skills under fire. The AMBOSS Self-Assessments are critical milestones in your prep, and taking them under timed, exam-like conditions is non-negotiable if you want an accurate prediction.
This means finding a quiet space, silencing your phone, and committing to the full testing block without any interruptions. Treat it exactly like the real 9-hour Step 2 exam. This is also your chance to practice managing your break time. Decide ahead of time if you’ll take a short break after every block or combine breaks for a longer rest. This simulation builds mental and physical stamina, which is every bit as important as your medical knowledge.
The stakes for Step 2 have never been higher. The USMLE Management Committee recently increased the passing score from 214 to 218 for exams taken after July 1, 2025. This change reflects rising performance standards, especially now that Step 1 is pass/fail. For students targeting competitive residencies where average scores are creeping past 250, every single point counts.
Ultimately, the goal is to use data to study smarter, not just harder. By regularly diving into your analytics and simulating test day, you transform raw performance data into a powerful, score-boosting strategy. If you're looking for more ways to prepare, find out how to effectively use NBME practice exams for Step 2 in your schedule.
Pairing AMBOSS with One-on-One Tutoring
Even with a powerhouse like AMBOSS, it’s not uncommon to hit a scoring plateau. You can grind through question blocks for weeks, but the needle just won't budge. This is where bringing in an expert can completely change the game. Combining the data-rich environment of AMBOSS with the experienced eye of a one-on-one tutor turns your study tool into a precision instrument for your amboss step 2 prep.
The whole process starts when you give a tutor a look under the hood. By sharing your AMBOSS analytics, you let them see far beyond just your overall percentage correct. They can dig into your performance and see exactly how and why you're missing questions. Is it a pure knowledge gap on pulmonary embolism, or are you consistently misinterpreting subtle EKG findings in the vignette? A good tutor lives for this stuff—they spot those patterns in your session history and get right to the root of the problem.

Designing Custom Tutoring Sessions
Once they have this data, a tutor can build sessions laser-focused on your specific weaknesses. Forget a generic review of cardiology. Instead, your session might zero in on differentiating various forms of cardiomyopathy, simply because your Qbank performance shows it's a sticking point. This is what makes tutoring so effective—every minute is spent on high-yield areas that will actually get you more points on exam day.
A tutor can also use AMBOSS questions as a live teaching tool. Picture this: you’re screen-sharing, looking at a gnarly, 5-hammer question together. They’ll have you walk through your entire thought process out loud, from start to finish. They can pause you, challenge your assumptions ("Why did you rule that out so quickly?"), and help you forge a much stronger clinical reasoning framework.
A Real-World Scenario
Let’s take a student who is stuck in the low 230s on their practice tests. They feel like they’ve hit a wall. Looking at their AMBOSS analytics, a tutor spots a peculiar pattern: their knowledge base seems solid, but they keep tripping up on multi-step management questions. They nail the diagnosis but then get lost on the second or third step of the treatment algorithm.
This isn't a knowledge deficit; it's a reasoning error. Here’s how a tutor would tackle it:
- Targeted Questions: First, the tutor pulls up a custom block of AMBOSS questions tagged with "multi-step management" from the student's weakest areas.
- Deconstruct Together: They break down the first vignette, highlighting key patient data and working through the differential.
- Build the Framework: The tutor doesn't just give the answer. They prompt the student to build a mental algorithm, asking, "Okay, you've started IV fluids and antibiotics. What's the very next thing you must consider? Why?"
- Practice and Repeat: They drill through several similar questions until the student can confidently navigate the management pathway on their own, without any prompting.
This approach attacks the core problem directly. The student walks away not just with a few new facts, but with a whole new system for tackling a question type that was single-handedly holding back their score.
Tutoring isn't about re-teaching you med school. It's about sharpening your test-taking instincts and fixing the subtle reasoning errors that analytics alone can't pinpoint. It provides the "why" behind your performance data.
Measuring Progress and Refining Your Plan
The partnership doesn't stop after one session. A great tutor will use your ongoing AMBOSS performance to track your progress and tweak the study plan. They might assign specific Library articles to shore up a weak spot or create custom question sets to hammer home a concept you covered together. It's a continuous, data-driven cycle: assess, intervene, and reassess, making sure you’re always working on what matters most.
This approach transforms your AMBOSS prep from a solo grind into a guided, expert-led journey. If you feel stuck or just want to make sure you're getting everything you can out of your prep, working with a dedicated USMLE Step 2 tutor can provide the structure and insight you need. It’s an investment in a personalized strategy designed to help you peak at the right time—on test day.
Common Questions About the AMBOSE Step 2 Plan
It's natural to have a ton of questions when you're mapping out your study plan. For a monster exam like Step 2, you want to be damn sure you're spending your time on the right things and getting the most out of your tools.
Let’s get into some of the most common questions I hear from students when we're building out a study strategy using AMBOSS. Getting clear, no-nonsense answers helps you cut through the anxiety and focus on what actually matters: learning the medicine and walking into your exam with confidence.
How Much of the AMBOSS Qbank Should I Aim to Complete?
This is the classic quality vs. quantity debate. Look, seeing that 100% completion bar in your Qbank is tempting, I get it. But it’s not the smartest goal for most people.
A much better target is to get through 80-90% of the Qbank on your first pass, but—and this is the important part—with a ridiculously thorough review of every single question. That means digging into why the right answer is right and why every wrong answer is wrong.
The real learning doesn't happen when you click the answer; it happens in the review. If you're just blazing through questions to hit a number, you're setting yourself up for burnout and you won't remember half of it.
If you start feeling the time crunch, you have to get strategic. Shift your focus to the big-ticket subjects that dominate the exam, like Internal Medicine and Surgery. Even more importantly, you absolutely have to tackle the tough 4 and 5-hammer difficulty questions. These are the complex, multi-step vignettes that mirror the hardest questions you'll face on test day. They're what separate a good score from a great one.
Can I Score High on Step 2 Using Only AMBOSS?
Absolutely. Plenty of students have used AMBOSS as their one and only resource and walked away with incredible scores—we're talking 260+. It’s a beast of a tool. The way the Qbank and the deep, interconnected Library work together gives you everything you need to build a rock-solid clinical foundation.
That said, the highest scorers almost always sprinkle in official practice materials. To get a true feel for how the exam writers think and to get the most accurate score prediction, you should definitely work the official NBME practice exams into your dedicated study period.
Using only AMBOSS can get you a fantastic score, but integrating NBME self-assessments is a critical reality check. They calibrate you to the real exam's style and give you an honest look at where you stand.
Think of the NBMEs as the final dress rehearsal. They’re the closest thing you'll get to the real deal and are invaluable for shoring up any last-minute weak spots and building that unshakable test-day confidence.
When Is the Best Time to Take the AMBOSS Self-Assessment?
Timing your practice exams is a strategic move. Don't just take the AMBOSS Self-Assessment randomly; use it to guide your prep. I like to think of it as a diagnostic tool you deploy at two critical points.
Here’s how to play it:
- Right at the beginning of your dedicated period. Take it as soon as you start. Forget about the score for now—it’s probably not going to be amazing, and that's okay. The whole point is to get a baseline. This gives you a data-driven map of your strengths and weaknesses, allowing you to build a study plan that hits your weak areas hard from day one.
- About two to three weeks before your exam. Taking it again 2-3 weeks out serves a totally different purpose. Now, you’re checking your progress, building the mental stamina to get through a full-length exam, and identifying any final high-yield topics that need a quick, focused review.
Using this two-step approach transforms the self-assessment from just another test into a powerful GPS for your entire study journey. It helps you start smart and finish strong.
At Ace Med Boards, we specialize in taking a powerful resource like AMBOSS and building a personalized, high-yield study plan around it. Our tutors can help you make sense of your analytics, fix deep-rooted reasoning errors, and build the confidence you need to crush your exam. Learn more and book a free consultation today to see how we can help you hit your goal score.
